Preparing your home for a shingle replacement can seem like a daunting task, but with the right steps, you can ensure a smooth and successful process. Whether you’re dealing with damaged shingles or simply want to upgrade your roof, this guide will walk you through each step to make your experience as hassle-free as possible. Let’s get started!

1. Assessing the Current Condition of Your Roof
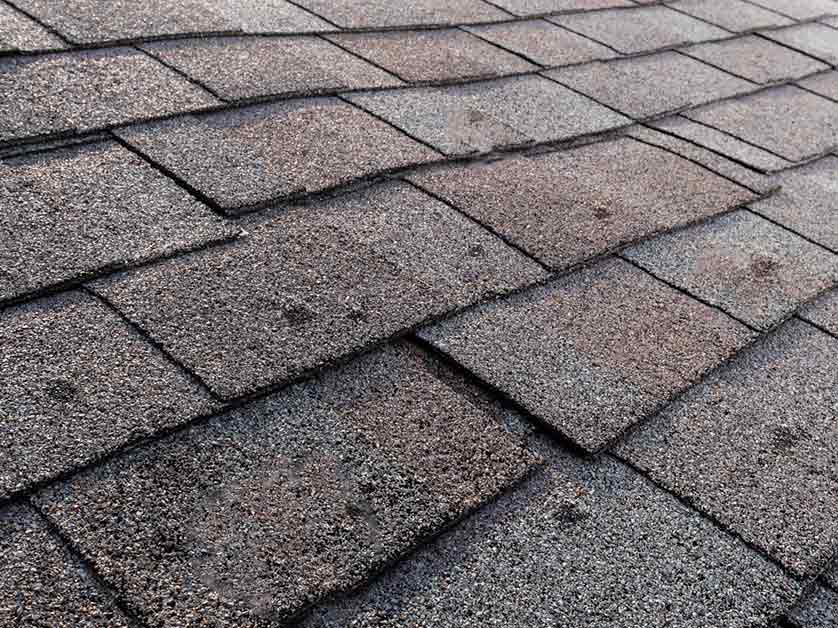
Before jumping into the logistical planning of a shingle replacement, it’s important to take a step back and assess the current condition of your roof. Look for visible signs of wear and tear; missing shingles, curling edges, or cracks can indicate it’s time for a replacement. A quick visual inspection can provide insight into how extensive the damage really is. You might even consider enlisting a professional roofer to give you a detailed evaluation—this investment can save you from more costly repairs down the line.
In addition to examining the roof’s surface, check the underside of your roof if possible, particularly in the attic. Look for signs of leaks or water damage, such as dark spots or mold. These issues can lead to serious structural problems if left untreated. Documenting your findings is a great practice, as it will not only help you determine how urgent the replacement is but will also give you a clearer perspective when discussing issues with your roofing contractor.
2. Understanding Your Shingle Options
Once you’ve assessed the condition of your roof, it’s time to delve into the various shingle options available to you. Asphalt shingles are the most common, known for their affordability and durability. However, there are also architectural and premium shingles that offer enhanced aesthetics and extended warranties. Researching these options can feel overwhelming, so create a shortlist based on your budget, climate, and the specific look you desire.
Apart from aesthetics and cost, consider factors like longevity and environmental impact. Some homeowners opt for eco-friendly materials that can provide energy savings and reduce your carbon footprint. Additionally, local building codes may dictate certain requirements, especially in terms of weight and fire resistance. Understanding all of these components will empower you to make an informed decision that suits both your home and your personal style.
3. Gathering the Necessary Tools and Materials
If you’re planning a DIY approach to your shingle replacement, gathering the necessary tools and materials is a critical step that requires careful consideration. Essential tools typically include a nail gun, roofing hammer, roofing nails, and safety equipment like harnesses and goggles. You may also need ladders or scaffolding to safely access high areas of your roof. A checklist can be very helpful in ensuring you have everything you need before the work begins.
When it comes to materials, aside from your chosen shingles, you might need underlayment, flashing, and sealant to ensure a durable result. Make sure to verify the quantity of shingles required based on your roof size and layout. Always purchase a little extra to account for any mistakes or future repairs. Organizing your supplies ahead of time can save you from frustrating trips to the hardware store during the process.
4. Creating a Safe Work Environment
Safety should be your top priority when replacing shingles. Before you set foot on your roof, ensure the workspace is clear of hazards. Remove any debris or obstacles that could lead to slips or falls. It’s also wise to check the weather forecast—avoid working in high winds or rain, which can create dangerous conditions. If you’re not comfortable on ladders or heights, that’s a sign to consider hiring professionals.
Additionally, donning the appropriate safety gear is non-negotiable. This includes sturdy footwear with good grip, gloves, and hard hats to protect against falling objects. Having a friend or family member assist you can also be beneficial. They can help keep an eye on the area and provide assistance when needed, making the project safer and more enjoyable.
5. Preparing Your Property for Construction
Now that you’re set with tools and safety measures, it’s time to prepare your property for the impending construction. This involves several steps to protect your home and surrounding areas. Start by moving any vehicles away from the work zone; you don’t want to risk having debris damage them. You should also remove or cover outdoor furniture, plants, and landscaping to prevent dirt and materials from causing havoc.
It’s wise to inform your neighbors ahead of time as well, especially if the noise might disrupt their routine. Sharing your schedule and providing a little context can foster goodwill and understanding. Clear communication can go a long way in maintaining a good relationship, prioritizing everyone’s comfort during the process.
6. Finding the Right Roofing Contractor
If you’ve opted to hire a professional for your shingle replacement, the next step is finding the right contractor for the job. Start your search by asking for recommendations from friends or family, and check local reviews online. Don’t rush this process—investing time in research can help you find a credible contractor who fits your budget and timeframe. Always verify they’re licensed and insured to ensure they can handle any unexpected challenges.
Once you’ve compiled a list of potential contractors, reach out to them for quotes. It’s crucial to get at least three estimates in writing, enabling you to compare services and prices. However, remember that the lowest price isn’t always the best choice—evaluation of quality and reputation is key. Local contractors often have a deeper understanding of your specific weather conditions and roofing needs, making them a smart choice.
7. Scheduling and Planning the Replacement
With a contractor on board, you’ll work together to schedule and plan the shingle replacement. Effective communication here is essential; clarify your expectations and any particular concerns you may have. Discuss timelines and what should be done in preparation for the work. Understanding their workflow can help you organize your days around the project, minimizing disruptions to your routine.
Keep in mind that weather can play a role in scheduling; poor conditions can delay work. Flexibility is vital here. Be prepared for possible changes and stay in contact with your contractor to keep updated on the schedule. Once everything is in place, you’ll be well on your way to enjoying a new, secure roof—complete satisfaction will follow!


